How to Enable Onvif on Hikvision Cameras

Table of Contents
Why you cant add Hikvision cameras to NVR?
ONVIF protocol has been disabled by default in IP camera firmware versions since v5.5.0. Disabling the ONVIF protocol by default ensures a more secure installation and promotes cybersecurity best practices. It is a cybersecurity best practice to disable all services that are not being used because it reduces the attack surface of the device. Disabling services by default means that the end user can turn on only the services that are needed. Attackers focus on default settings because many end users do not remember to change them. This article explains how to enable Hikvision ONVIF protocol in these cameras.
This guide will show you step by step on how to load a Hikvision camera to a 3rd party NVR such as Dahua, Uniview, Milestone etc.
*Important Note* Make sure you set the IP address the same as the NVR’s requirements. This will depend on where you are connecting your camera to the network. You have 2 options, 1 will be into the back of an NVR with a built in switch or an external switch. If you need help working out your network connections follow this link:
Setting the correct IP address for my camera
This guide is based on you knowing the IP address of your Camera.
Summary: Enable Onvif on Hikvision cameras:
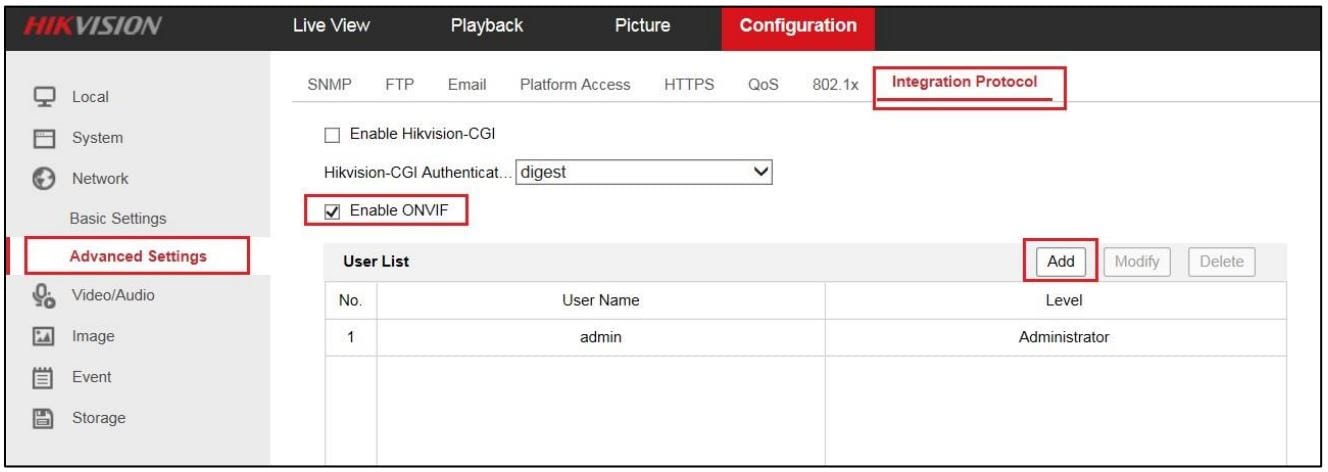
- Navigate to the camera IP address – Default IP is 192.168.0.64
- Login in to cameras web interface.
- Go to Configuration -> Network > Advanced Settings
- Click the Integration Protocol tab (Top right)
- Click the Enable ONVIF checkbox
- Click the Add button to display the Add User window
- Create an Admin user (Use these details when adding the camera to the NVR)
- Hit Save
Once these settings have been updated you should now be able to add your camera to your NVR using the IP address and the user you have created following these steps.
Step by Step Guide with Images
Step 1: Navigate to the Camera using a web Browser
Login using the credentials you have set. If you have not setup your username and password you will need to complete this first. See this guide Setup Hikvision Camera with the SADP tool.

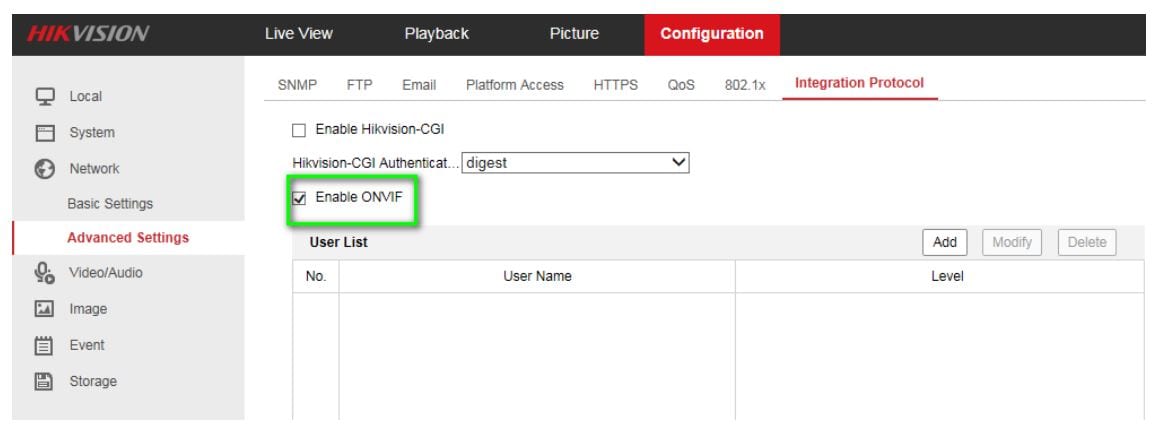
Step 2: Navigate to Configuration -> Network -> Advanced Settings
On this page you will need to click Integration Protocol on the top right of the page and then Tick Enable ONVIF

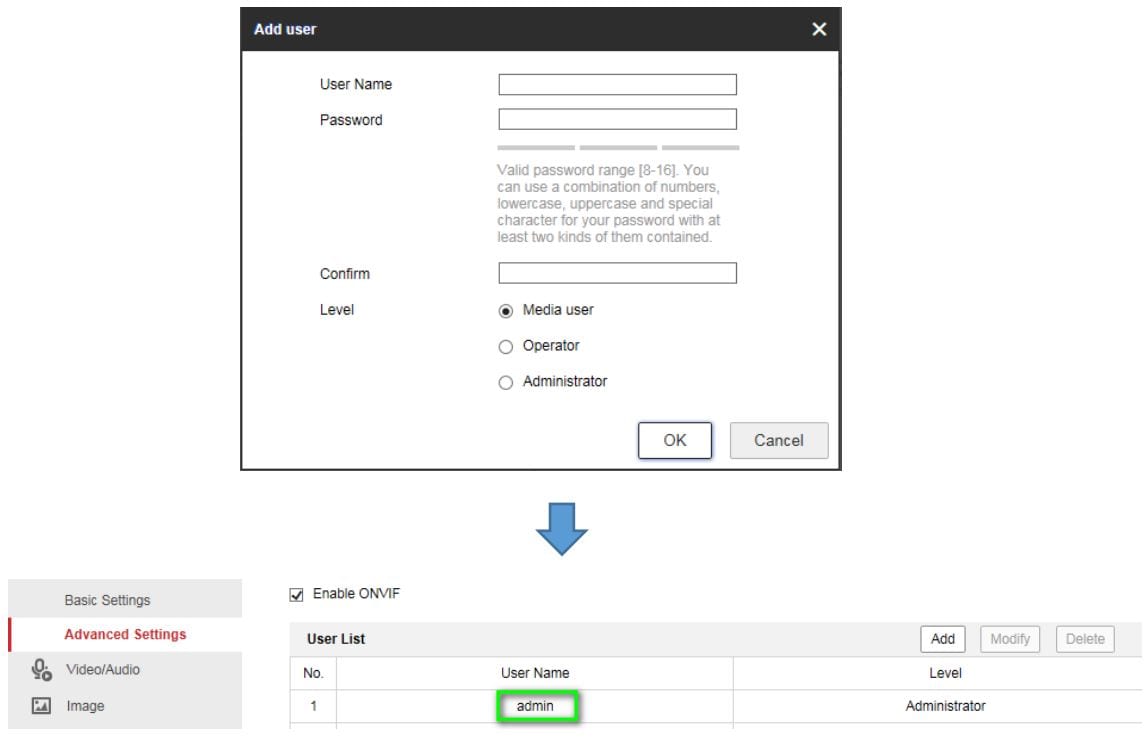
Step 3: Click the Add button to display the Add User window
Media user, Operator user and Administrator user is selectable. Enter your user name and password and select the Administrator user level. This will be the username and password you will use when adding the camera to the NVR.


You will now see the user displayed in the userlist like above. You should now be able to successfully add your camera to the NVR.
How to enable ONVIF in Batch Configuration Tool
- Download & install BatchConfigTool from Hikvision Tools
- Install & open BatchConfigTool in your PC
- Select the online devices-> click Add-> login with admin account

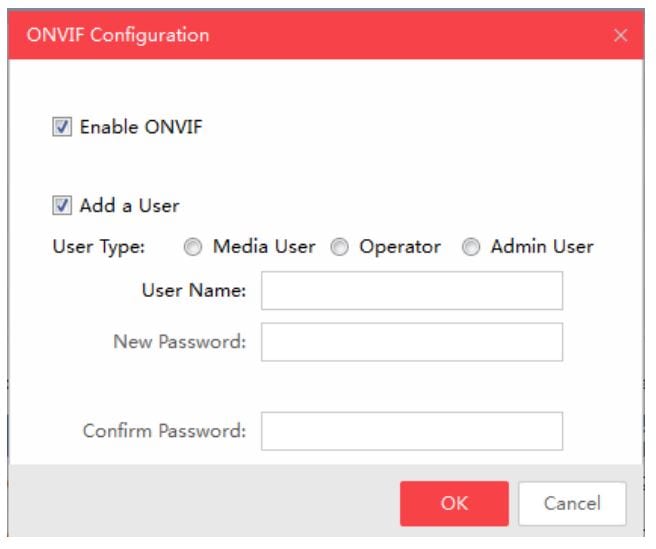
- Select the added device->click More->ONVIF Configuration

- Click Enable ONVIF checkbox to enable this function
- Click Add to add new users

Use these details to add your camera to the NVR.


